Abstract Wizard
Abstract management in Eventify is the process of collecting, reviewing, and selecting abstracts for your event. You can collect applications with our customizable essential question templates, review, shortlist, accept, reject and do much more.
Here are the steps you need to follow for creating an abstract invitation.
Step 1: Abstract Info#
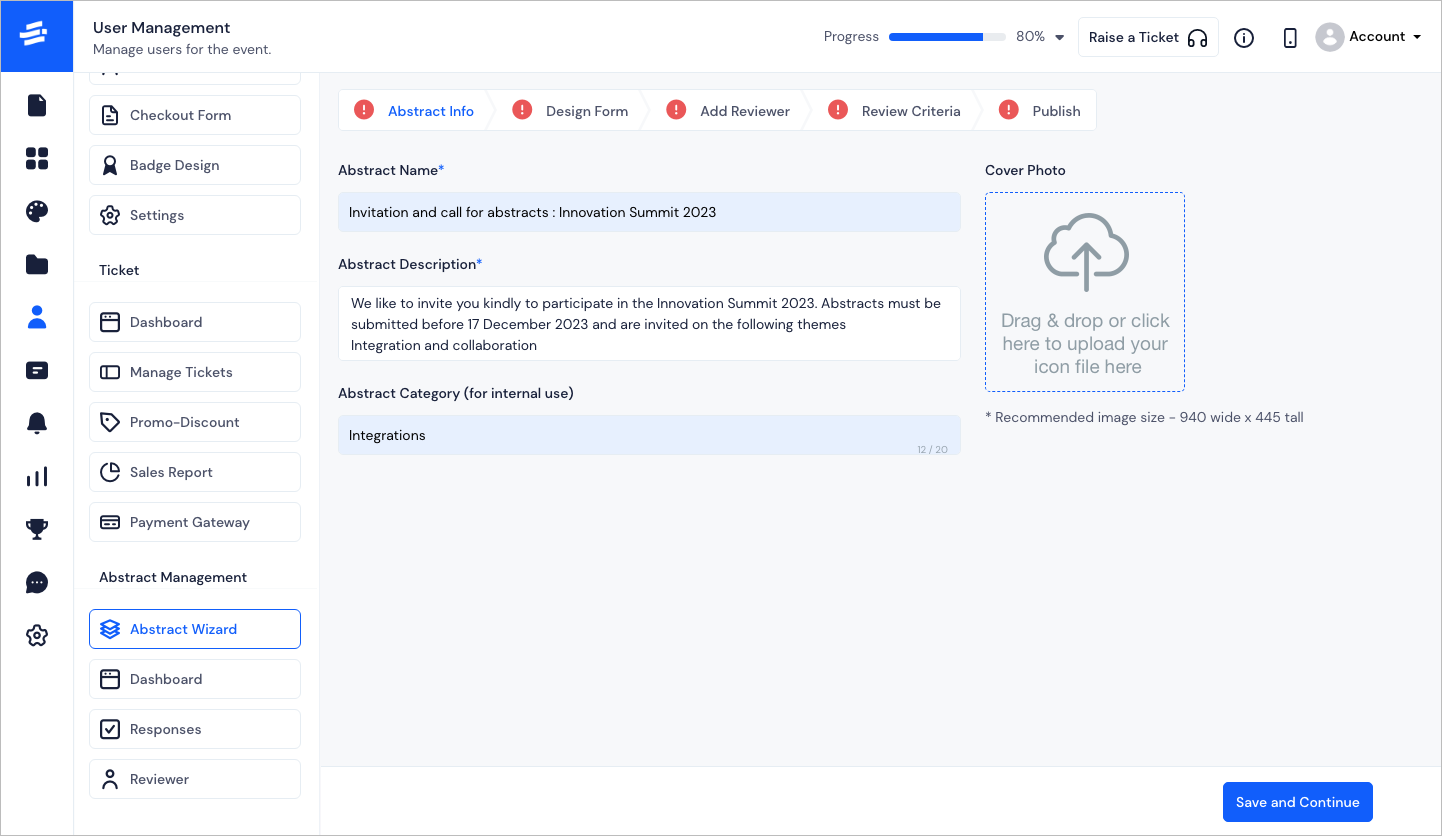
To create the abstract invitation you need to start with the basic information
Abstract name where you give a title for the invitation.
Abstract Description for describing the purpose of this invitation with a brief introduction to your event.
Abstract Category, is for internal use and it will help you to identify the submissions later during review.
Click on Save and Continue to go to next step
Step 2: Design Form#
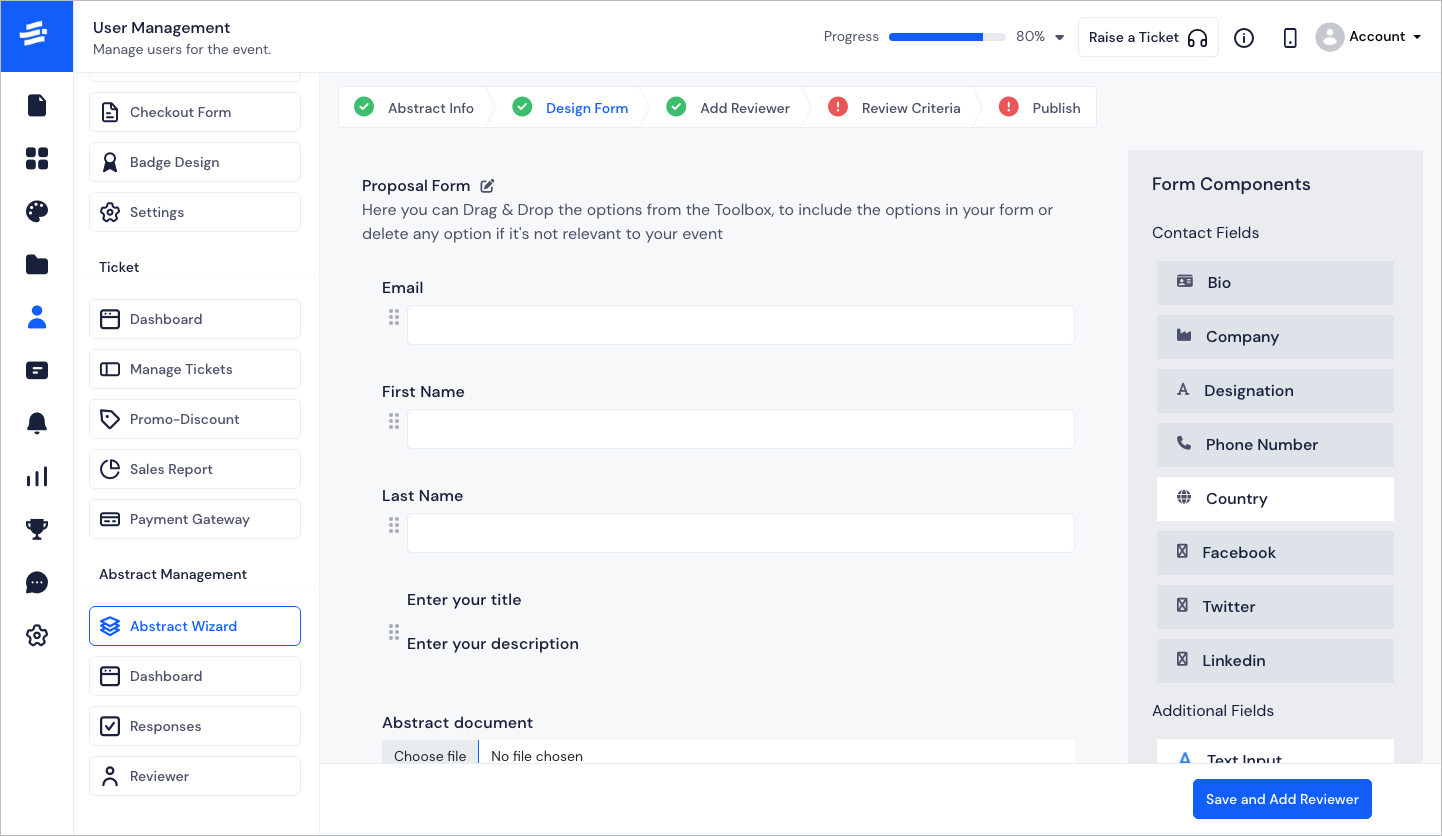
To design the proposal form, select the field type you require from the Form Components on the right side of the form builder
Drag and drop the required fields on the left panel of the form builder
Rename the fields as required
You can also drag to rearrange the fields or delete them
Rename the form name if required
Click on Save and Add Reviewer to go to next step
Step 3: Add Reviewer#
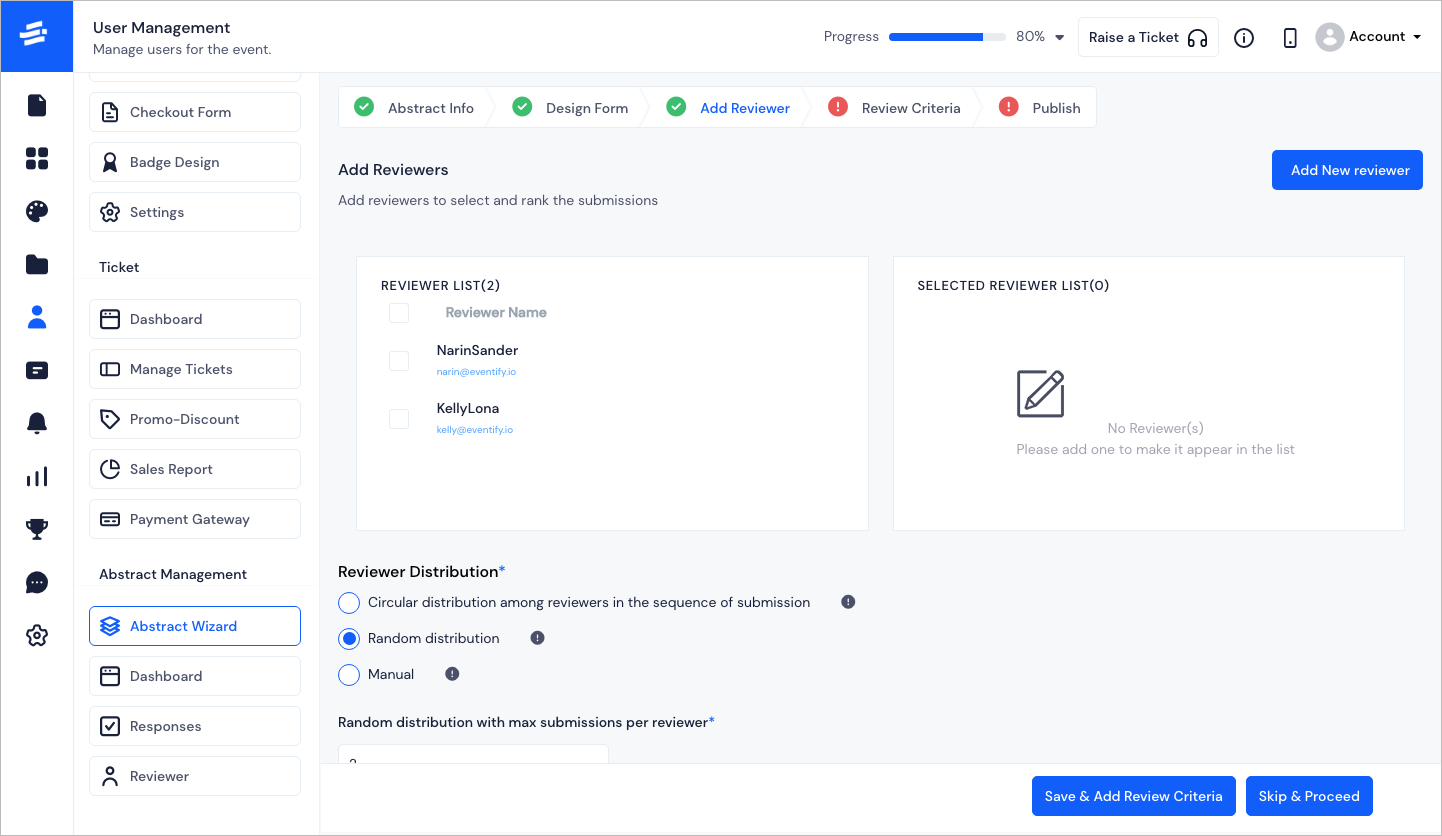
To handle thousands of abstract submissions, you can set up your team of reviewers. All incoming abstracts will be distributed among the reviewers based on the distribution algorithm you select. There are 3 available options:
Circular distribution among reviewers in the sequence of submission - Here the distribution will be on a round-robin basis.
Random distribution - Here the distribution will be based on the maximum submission value per reviewer.
Manual - Here the distribution will be based on manual assigment by you. All submissions will be assigned to admin by default.
To add new reviewers click on Add New Reviewer button and the Add Reviewer form will open.
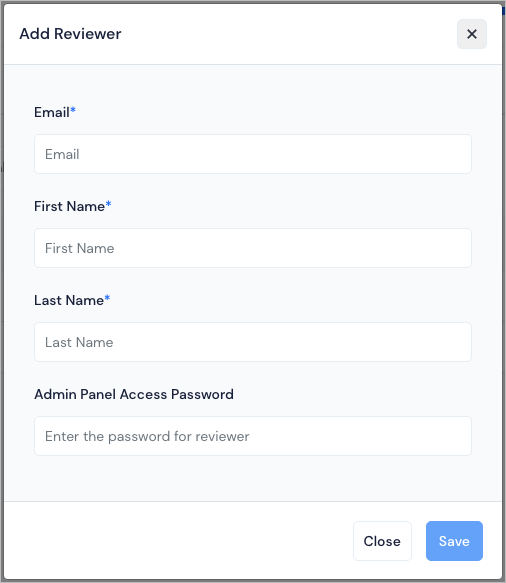
Enter the basic details - Email, First and Last Name and Access password for adding the reviewer.
Then from the list of all available reviewers, select the ones you want to assign for this abstract.
Click on Skip & Proceed if you want to leave the assignment to manual or click on Save & Add Review Criteria to save any other selected assignment and go to next step.
Step 4: Review Criteria#
In order to review the abstracts, you need to set up the parameters of judgement. Review Criteria will define these paramaters and the point range for each.
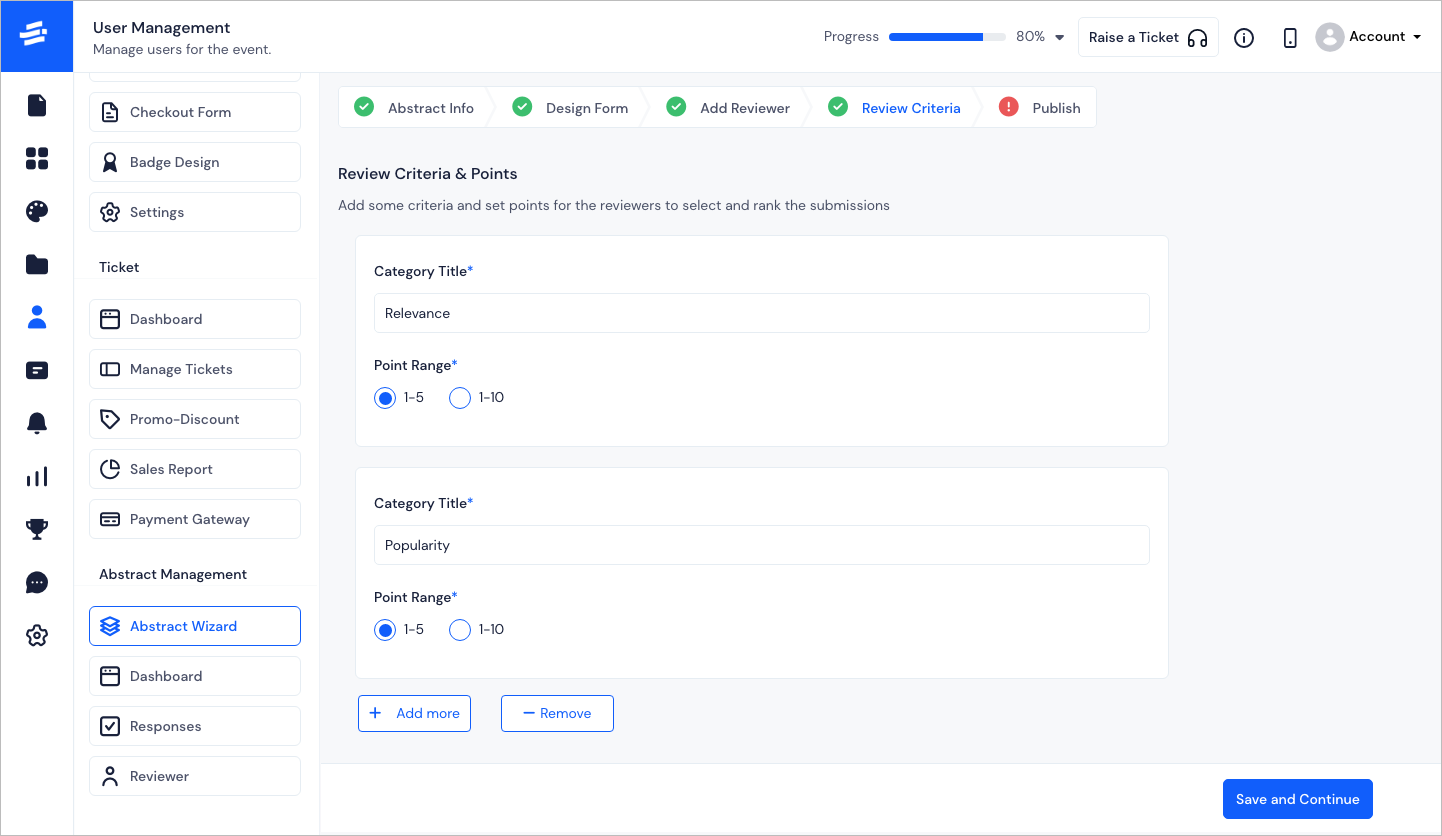
Category Title will define the parameters you want to judge in the submitted abstract. You can add or remove paramenters as required.
Point Range will be associated with each parameter. You can have the rating on either 1-5 or 1-10 depending on your requirement.
Click on Save and Continue to go to next step
Step 5: Publish#
This is the final step of the abstract invititation where you can set the duration and limits. The created abstract form will be ready for submission once you publish.
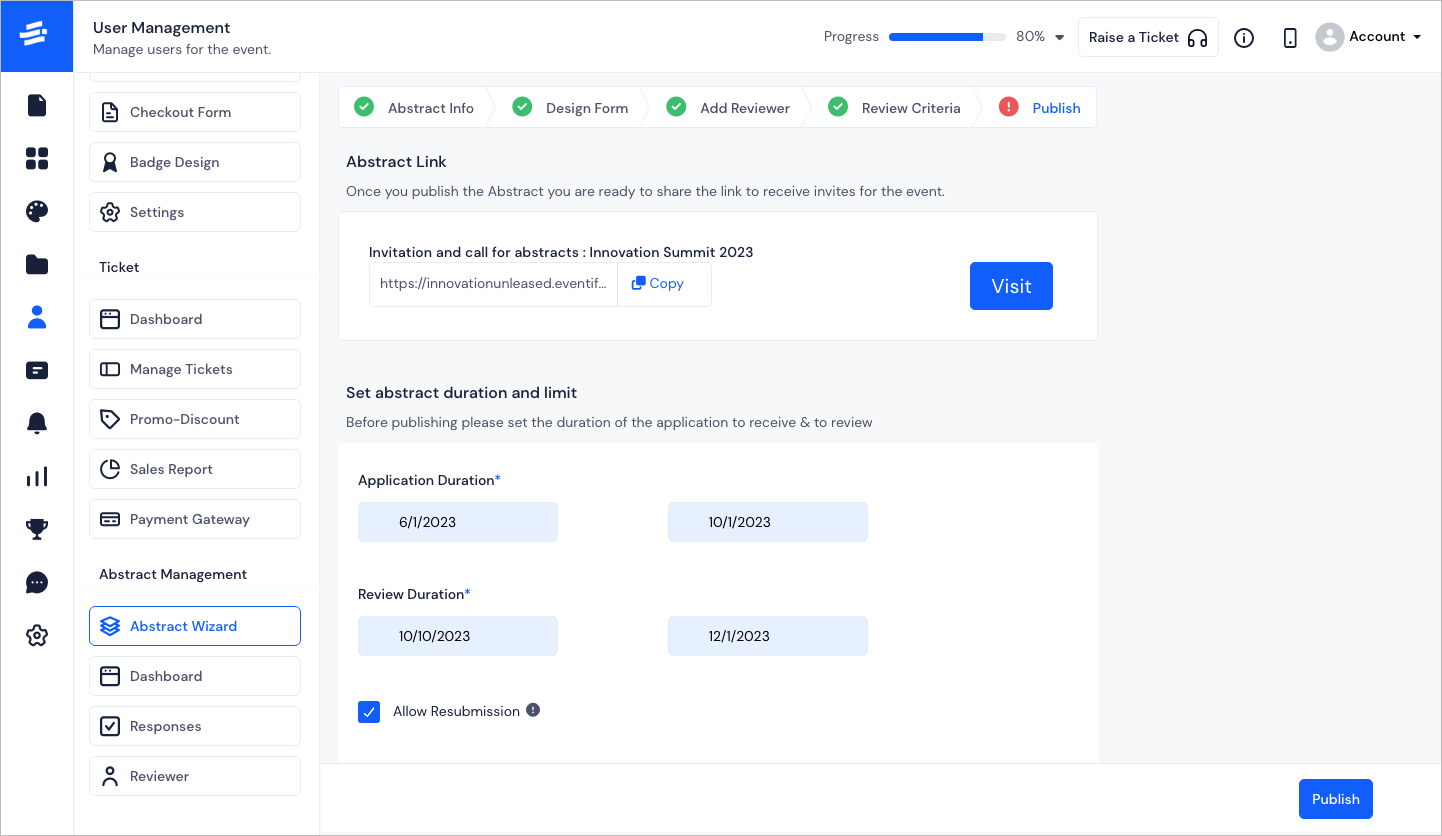
You will find the abstract link here and can set up the following:
Application Duration - This signifies the start date and end date through which people can apply.
Review Duration - This signifies the duration in which the review process will be conducted.
Check Allow Resubmission if you want to allow the applicants to resubmit their applications until it is reviewed.
Click on Publish to go live.