Effortless Ticket Process: Streamlining Event Passes
Eventify, offers a streamlined solution for organizing and streamlining event passes. In this article, we will explore how Eventify simplifies the ticketing process, making it effortless for event organizers and enhancing the overall attendee experience.
Go to User User Management > Wizard and follow just 5 steps to publish your ticket live. Let's check the steps:
Organization Details#
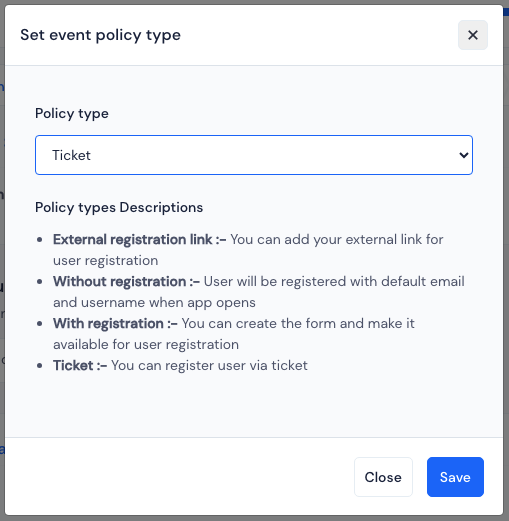
In order to be able to activate ticketing, select User Registration Policy as Ticket.
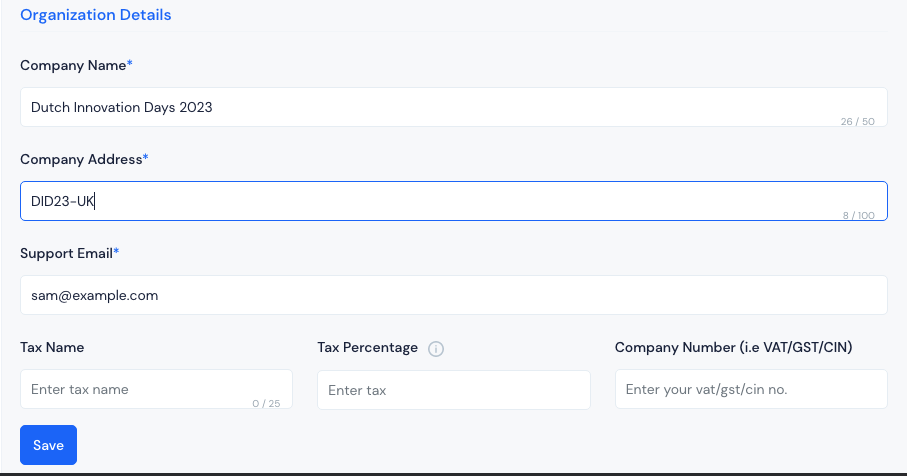
Next fill up the organization basic details, like:
Company Name
Company Address
Support Email
Tax Name & Percentage (if applicable)
Company Number (i.e VAT/GST/CIN)
Create Ticket#
Create the event's tickets under this section. Click on New Ticket to create a ticket. For details refer Crafting Event Tickets
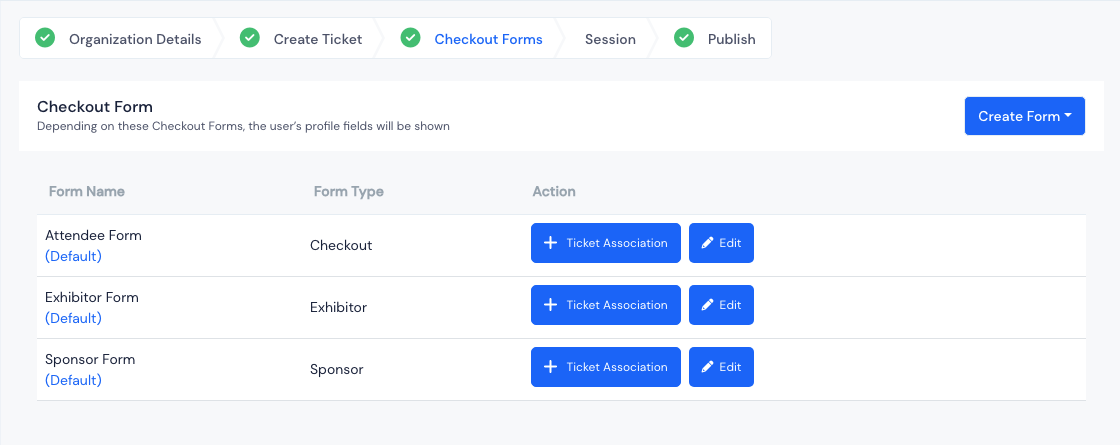
Checkout Forms#
Eventify provides default checkout forms for Exhibitor, Sponsor, Speaker and Attendee.These forms serve the purpose of collecting essential user information during a ticket purchase or registration.
You can create more custom checkout forms from the Create Form option. To know more about creating custom checkout forms Go to Custom & Dynamic Checkout Form Builder
Note: Users will be able to enter information based on the fields on the checkout form, and that information will appear as the profile details of the user accordingly.
Session#
If you have paid sessions in your event, you can see the complete session calendar interface here. with the event's dates.
In order to assign a session with the ticket you will have to select the ticket inside that session.
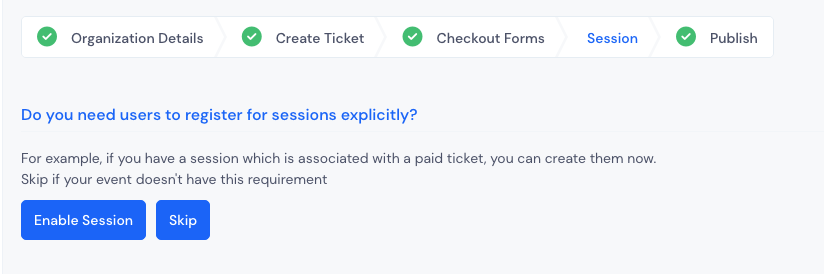
If your sessions does not have this requirement click on Skip.
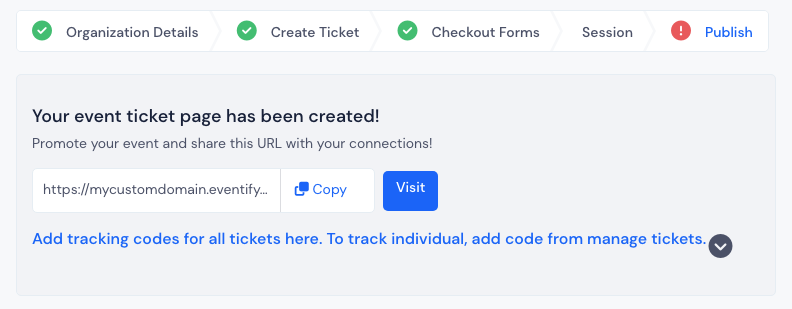
Publish#
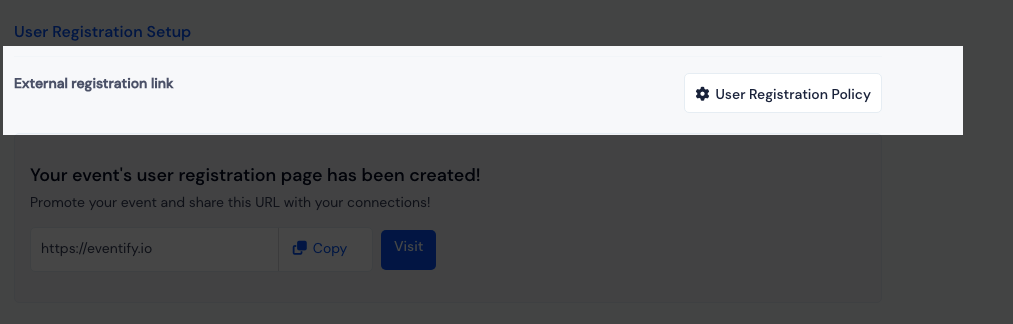
This is the final step, here you will find the Event ticket page URL. All the live tickets will be availble in the ticket page.
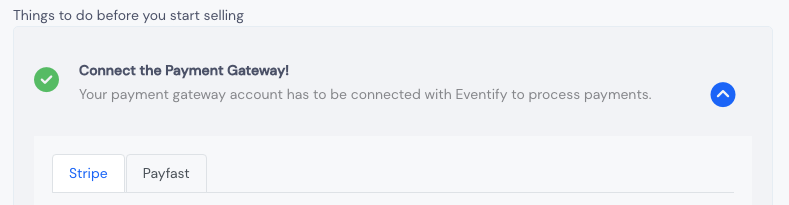
To make the ticket Sale live you need to make sure that the Payment gateway is connected and the sales terms information is filled in.
- Payment Gateway connection - Payment gateway account has to be connected with Eventify to process payments. You can connect with Stripe or Payfast.
- Mandatory Completion of Ticket Settings - Provide all the information under Terms & Conditions of the Event viz; Refund Policy, Privacy Policy, Terms & Conditions and Thank You Page message or link.
![enter image description here](../../static/img/effortlessticketingprocess/mandatoryticketsettings.png
Once you are done with all these steps, you are ready for user ticket sales and registrations.