Can I send custom notifications to attendees?
Yes, Eventify offers sending custom push notifications to attendees. With Outreach, you can send personalized messages to attendees. These options give you the flexibility to tailor your messages and engage with your audience effectively. Let's dive into the specifics!
Send Push Notifications#
Push notifications are like your event's trusty messengers! They do so much more than just remind attendees about the big day. They're pros at sharing any last-minute schedule or venue changes to keep everyone in the loop.These notifications can be sent in real-time along with accompanying emails or scheduled in advance. Here are the steps to reach users:
Choose the Notification Type: Decide whether you want to send a Push Notification, an Email & Push Notification combo, or just an Email.
Add an Image (Optional): If you have an image to go with your message, upload it. The recommended size is 200 wide x 200 tall.
Write a Catchy Title: Keep it short and within 100 characters to grab their attention.
Craft Your Message: Say what you need to say in 235 characters or less.
Select Your Target Audience: Pick who you want to reach - either All Confirmed attendees or a specific group of users.
On Click Redirect to: When setting up push notifications, you have the option to redirect users to another screen or link by entering the target URL.
Here are the three types you can use:
None: This one keeps it simple. No redirection, just a straightforward notification for sharing general info or updates.
Internal: Now we're talking! With this type, you can guide users to specific parts of the app, like the cool speakers, sponsors, community, exhibitors, and more. It's like a VIP tour within the app!
External URL: Here's where you can really spread the word! Use this type to promote external pages related to your event, and when users tap on it, they'll be taken to the awesome URL you added.
Sending Method: You can choose between sending the notification immediately or scheduling it for a future date. It's important to note that scheduled notifications will be delivered according to the event's timezone.
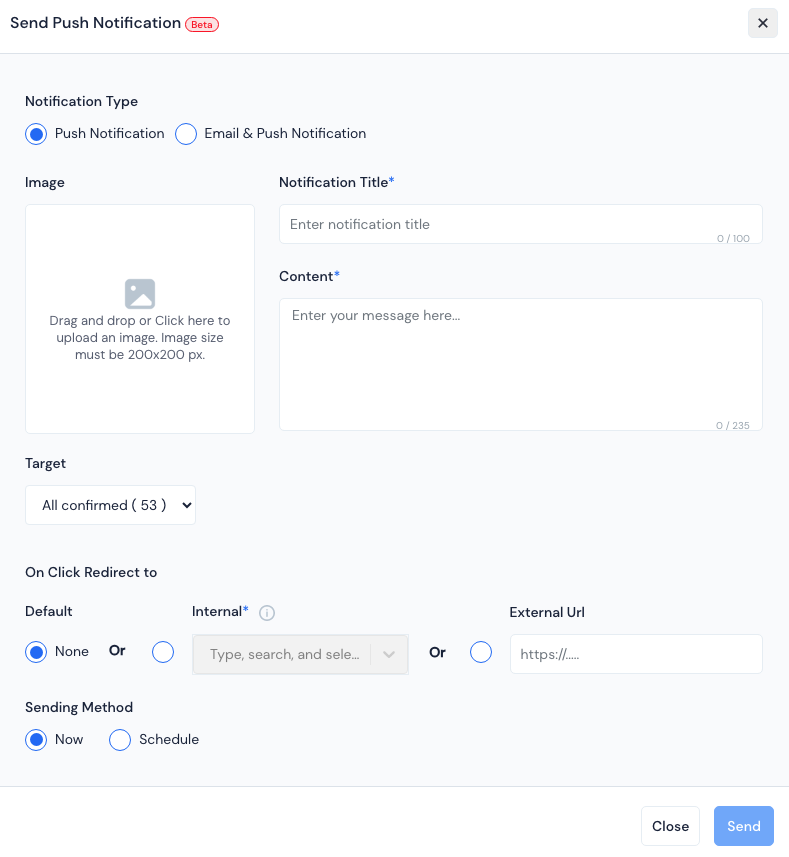
Now, Click on Send to send or schedule.
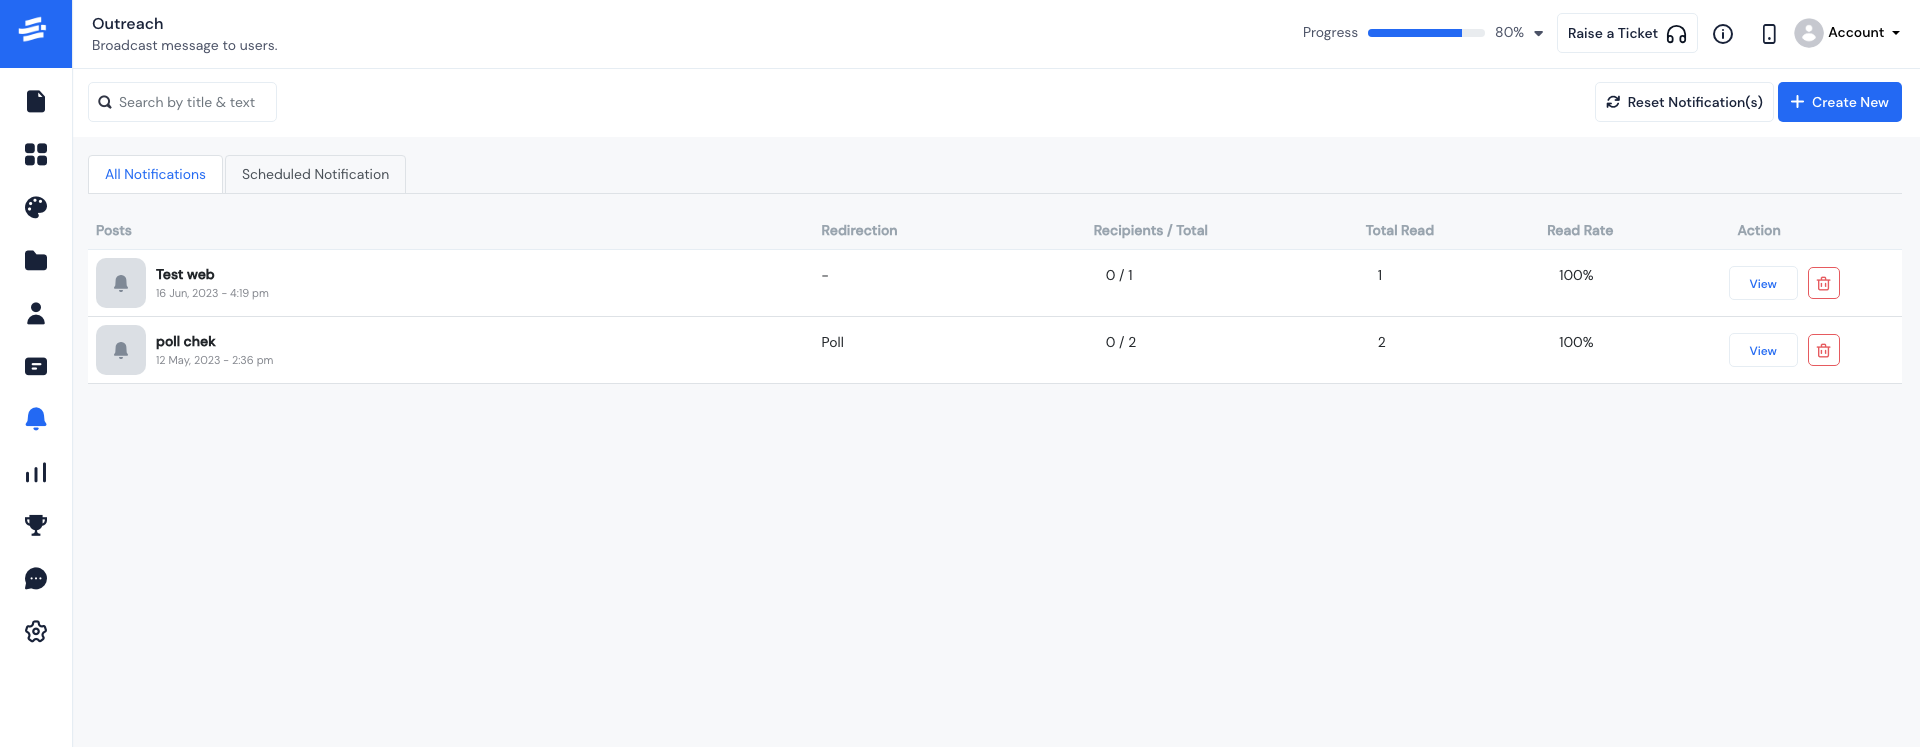
In the Outreach panel, you'll find two handy tabs for managing your notifications:
"All Notifications" Tab: This tab gives you an overview of all the notifications you've posted. It's like your notification hub, where you can see all the messages you've sent out.
"Scheduled Notifications" Tab: As the name suggests, this tab displays all the notifications that you've scheduled for future delivery.
Now, let's talk about the features you have within these tabs:
Access Important Information: You can find useful details like the redirection target (where the notification leads), recipient count, total read count, and read rate. It gives you insights into the performance of your notifications.
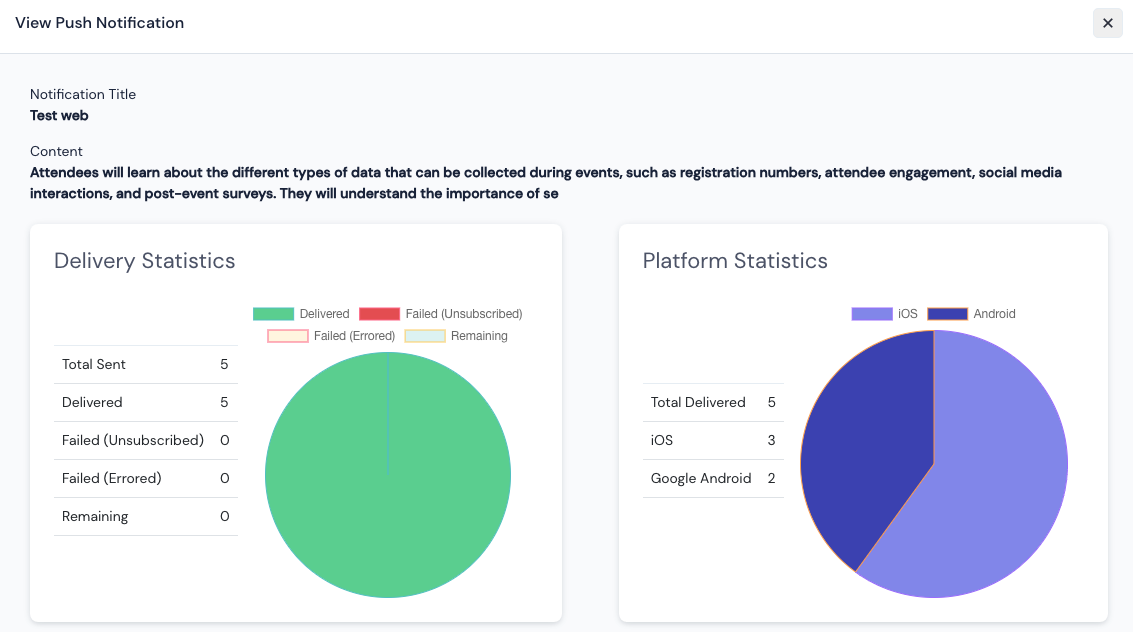
View Notification: This feature allows you to dig deeper. When you click on it, you'll be presented with informative pie charts that show delivery statistics and platform statistics for a specific notification. It's like a visual breakdown of how well your message is doing.
- Reset Notifications: This option lets you delete push notifications. You have the choice to remove all notifications at once or delete them individually.
